We find it hard to resist a challenge, so when Timisha of Toolbox Divas invited us to join the Cent-Sational Salvage Challenge we pretty much agreed outright. This would pit us against some other lovely bloggers, including Erica at On Bliss Street and Jason at East Coast Upcyclers, breathing new life into thrift store stuff. That’s one of our favorite things, what could go wrong?
But then we learned the rules for April – with a budget of only $15 (plus whatever supplies we already had on hand) we had to makeover kitchen utensils found at a Habitat for Humanity Re-Store into something we’d actually want to put in our house. Sounds like that could be a train-wreck…
(Update: The votes are in, and we won this illustrious competition! It was fun to see all the other projects, and we’re honored to have taken home the crown. Read on to see what masterpiece we cooked up.)
“Behind the Scenes” – Our Brainstorming Process
We immediately started brainstorming, and were careful to record detailed notes so we could bring you all along on our process.
Our original thought was that we could buy a whole lot of wooden spoons, burn them, and use the ashes for cave paintings. While that was promising, we are perfectionists here at Plaster & Disaster, and so we continued on in search of a better idea.
Our friend Stephanie suggested that we could buy utensils with cool shapes and use them to stamp patterns onto cloth napkins. But that sounded ludicrous, so we moved on to more practical ideas. For example, we thought a lot about the fact that forks looked like tiny pitchforks and spoons like tiny shovels for dolls. While we didn’t think we could afford silverware, dolls, AND a dollhouse on our $15 budget, we did consider stealing a dollhouse from a child to complete the project.
Since we couldn’t rely on finding a child to steal from, though, we headed out thrifting in search of further inspiration.
We were intrigued by how useful this hors d’oeuvres set looked.
With that flat piece, we thought we could spread some sort of putty or Spackle on the walls of our houses to fill holes. And we could call it… a Putty Knife. Brilliant! Plus the cheese fork would obviously be perfect as a doll’s pitchfork.
We also came across this giant whisk. At first we thought that we could pretend that we had invented an Expansion Ray and had made this out of a standard whisk, like in Honey I Blew Up the Baby.
But we thought that was disingenuous, so then we considered actually inventing a Shrink Ray and turning this into a normal-sized whisk. But with a $15 budget that seemed like a stretch, given that this whisk was already priced over $10. Wow, that budget is really limiting!
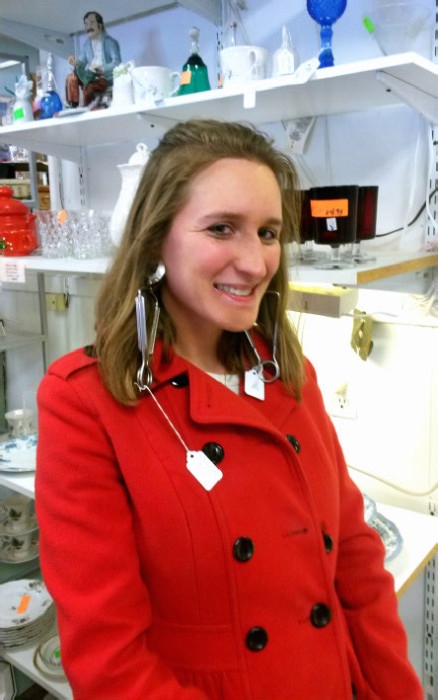
We also came across these excellent escargot tongs.
Are you thinking what we’re thinking? Earrings, of course!
Don’t they look good?! Really a statement. However, they were perfect as they were and didn’t really need any DIY transformations, so we didn’t think they’d qualify for this challenge.
By the time we arrived at the Habitat for Humanity Re-Store in Billerica, MA, it was time to actually make a decision about some materials.
We were drawn toward the silverware and all the interesting patterns on their handles. The Re-Store had these great packs of 4-6 in varied designs for $2 each, so we picked out a variety of our favorites.

The stranger we coerced into taking this photo must have thought we were *really* excited about this silverware to be requesting a photo with it.
Our final brilliant idea? Making a starburst mirror out of silverware!
DIY Starburst Mirror from Thrifted Silverware
The good thing about this project is that, other than the silverware, it needed very few other supplies. We already had safety gear and a dremel with an attachment specifically for cutting metal (you can find metal-cutting dremel attachments on Amazon (affiliate link, read our policies) fairly inexpensively if you don’t already own them), as well as various kinds of glue to try out. We also picked up a pack of four small mirrors from JoAnn Fabrics for only $0.99.
The first step was decapitating all of our silverware using the dremel. The metal cutting attachment made fairly quick work of each utensil, though we had a lot to do so it took a little while.
We didn’t realize how gruesome this step would be until we were staring at a pile of spoon and fork heads…they made for a strangely disturbing sight. The things we do in the name of DIY.
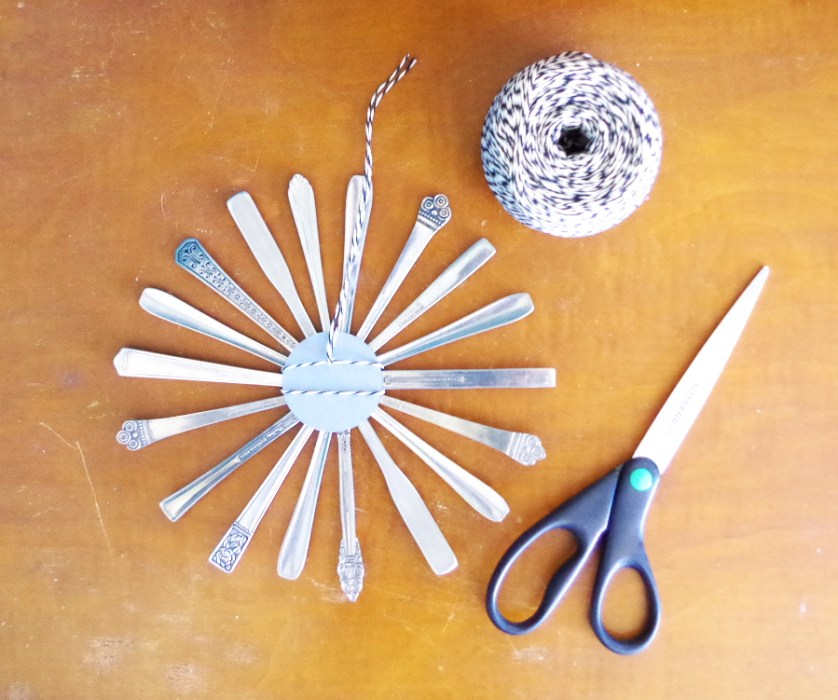
Next we laid the handles out in a pattern we liked, alternating some of the bolder patterns with the more plain handles. When we were happy with it, we took one of the mirrors and slathered it with E6000 craft glue (affiliate link — read our policies) from from the wedding magnet project. This stuff dries very firmly, but it takes awhile and the packaging is covered in warnings about how toxic it is so be sure to use it in a well-ventilated space (we were working in a garage).
Our plan was to use one mirror as a backing to glue the utensil handles to, before adding a second mirror on top. We carefully moved the handles onto the mirror surface and pressed them firmly into the glue.
We let it dry for a few hours to give it maximum air exposure, and then slathered the whole thing with glue again and laid a second mirror over the top. Then we left the whole thing to dry overnight (still in the garage, where the glue fumes wouldn’t cause any harm).
Our master plan had been to attach a hanging apparatus to the back with a hot glue gun. However, the glue would not stick AT ALL to the smooth surface of the back, and trying to hang it would have ruined our masterpiece when it fell on the floor and broke into a million pieces. Instead, we rigged up this sophisticated hanging mechanism with string.
Then, it was time to proudly display our handiwork.
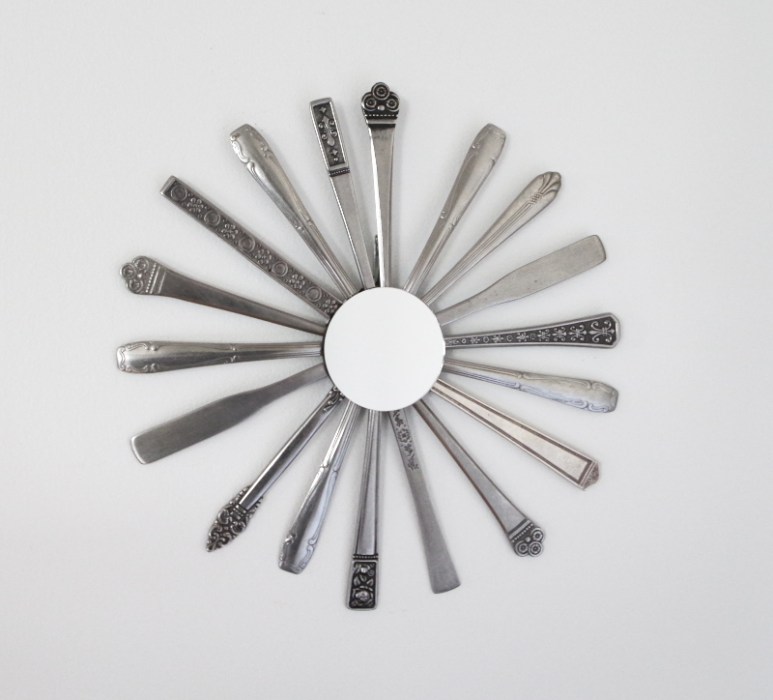
DIY Starburst Mirror from Silverware – The Reveal
A 2″ mirror is too small to be useful in the bathroom or bedroom, so we decided to use it as decoration in the hallway. It fits right in!
The varied patterns from the handles really look cool together, and add some interest and depth to the simple shape. We love the contrast between dark and shiny silver on the more intricate pieces. This could actually look good painted gold, but then we’d lose some of that depth and contrast, so we’re happy we left it as it is.
Who knew you could make an actual home decor item from just thrift store silverware!
So there’s our April entry to the Cent-Sational Salvage Challenge! Although we still think the utensil-ash-cave-paintings could have been a winner, we’re happy we reined it in and did something a little more practical. There are so many lonely pieces of silverware out there, we’re glad we found a way to put some to good use.
We can’t wait to see what everyone else came up with!
(Sharing at Craft-o-maniac, DIY Showoff, Tip Me Tuesday, Making Memories Monday, Whimsy Wednesday, Think and Make Thursday, and I Heart Naptime – and FEATURED at Kenarry Ideas for the Home and Redo It Yourself Inspirations)


