The topic today is my bedroom, where I’ve know for some time that I want to replace my tall dresser in the back corner with a long and low dresser. This was part of the plan when we moved Sam’s dresser into his study to hold office supplies, since Sam thus needed somewhere new to keep his clothes and I thought a long low dresser would be perfect for us to share. Here’s the corner in question:
I love this dresser — it’s part of a matching set with the dresser we moved to Sam’s study and my bedside table, and the set is a family heirloom. It’s not leaving the house, I just know there will be a better place for it down the road and a long dresser will work much better in this particular space.
Of course I wanted something with tapered legs, but I had visions of buying a chunky solid wood dresser off craigslist and then building a DIY mid-century base for it myself. Here in Boston, it’s very rare to come across a mid-century piece for less than many many hundreds of dollars, unless it’s laminate and requires painting — and I really wanted a natural wood piece.
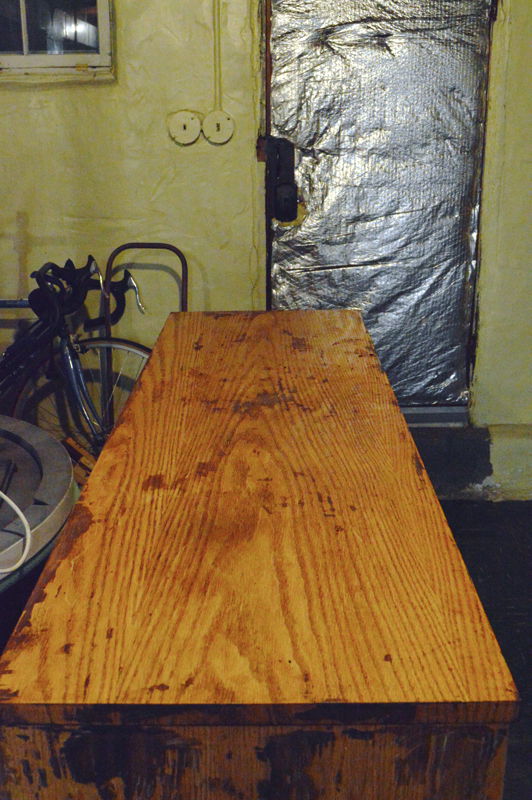
So, I trolled craigslist for many weeks, waiting for the right piece to come along. Finally, I came across this solid piece with the perfect dimensions, and snapped it right up. I mean yes it’s orange, but that’s easy to change right?
Before building the new mid-century base, I knew I first needed to remove the thick base along the bottom and then build a thin new base to mimic the framing around the outside of the rest of the dresser.
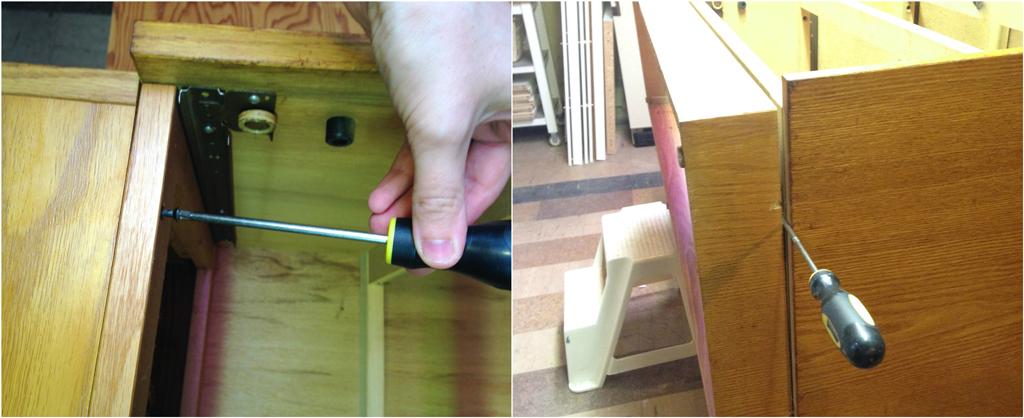
I removed the drawers, and Sam helped me lift the dresser onto the large work table in the basement so I could get to the base to remove it.
It was as simple as removing some screws and then prying the base off with a screwdriver.
This did leave behind some staples that had also been holding the base on, which I trimmed off with my go-to tool: the dremel.
To build the new base, I’d originally thought of using a large piece of plywood. However, I realized that it would be expensive to buy a single piece of plywood large enough to cover the full base of the dresser. Instead, I could mimic the look of a solid piece by building a frame out of inexpensive 1×3″ boards. I cut them to size on my table saw:
And then use my kreg jig to drill pocket holes to assemble the frame:
With the frame assembled, I attached it to the bottom of the dresser using the same screw holes and screws that had attached the original base.

Next it was time to build the new base with tapered legs. I found a super helpful tutorial on The Design Confidential that gave me an idea of how I wanted to build the base:
I used rough 2×3″ lumber to build the frame and the legs, though in retrospect I should have used finished 2×3″ boards because the rough lumber took stain differently than the rest of the dresser and it’s a bit noticeable.
To cut the legs, first I drew out my desired dimensions:

I rough cut each piece to length, and then clamped all four legs together and used my tablesaw to cut all the legs to the exact same length.

Making the angle cut for each leg wasn’t simple. I don’t have a chop saw or miter saw, which I think would make this easier — instead I have a circular saw (which doesn’t work well for something this small), my table saw (which requires a lot of work to cut angles), and my jig saw (which doesn’t cut as smooth a straight line as I wanted for these legs). To get the cuts, I used my jig saw to cut a “jig” for the table saw, ie angled pieces of wood that I used to position the leg pieces at the right angle to push through the table saw. Here’s what an actual jig looks like (not my version), just to give you an idea:
I didn’t take a photo of mine because I’m not sure it was entirely safe and I don’t want you to copy me and accidentally saw your hand off. But fortunately I ended up with four tapered legs and two intact hands.
I cut the rest of the frame on my table saw, and then laid out the frame and legs on my super awesome workbench.
Like with the first frame, I used my kreg jig to drill pocket holes and assemble the whole thing.

Ignore the three holes here… I ran out of long pocket screws and had to drill a new hole for a shorter screw.
I screwed the frame into the dresser from the top, and voila!
The last step was to use some veneer edging I had left over from the coffee table project to cover the edges of the 1×3 frame so it would look like a single solid piece. (For details on how to use iron-on veneer edging (which is awesome), check out this post on how I made the top for my coffee table.)
Before the veneer on the left, after on the right:
Next up was staining the dresser. I decided to use gel stain, since I’d read good things about it as an alternative to stripping and sanding the original finish.
The only prep work required was a light sanding, and then I brushed on the gel stain.
That left me with a beautiful finish, and I was done! Yay!
Just kidding, I hated the gel stain — it was blotchy, showed all the brushstrokes, and even after a week of letting the first coat dry it still felt sticky to the touch. I’m sure it was user error, but It just wasn’t working for me.
I pouted for a little while, and then decided to strip the new gel stain finish plus the original finish and stain it normally. I used Citristrip, which claimed to be safe for indoor use and not have any strong fumes.
I brushed it onto every surface, and was definitely pleased by the light orange scent and nothing nearly so terrifying as I had expected given how much people seem to avoid stripping furniture.
My only complaint was that the directions suggested leaving it on for up to 24 hours, but actually it was good to go within 30 minutes and dried shortly thereafter, so I ended up having to recoat every surface to get a wet finish for the next step: scraping off the Citristrip, and with it the finish. I used a spackle knife for this very strange task.
Below is the top of the dresser after the first round with the Citristrip. Given that I was removing two layers of finish (the original finish and my ill-fated gel stain mess), I did a second round after this.
Next up: time to sand, sand, and sand some more.
The sanding made such a huge difference, revealing the lovely raw wood underneath. Below are two drawers side-by-side, the one on the left has been stripped but not sanded, the one on the right is sanded. Goodbye orange!
Here’re the top of the dresser halfway through sanding:

Of course Murphy needed to help. (This was actually a huge problem during the project — Murphy could not help climbing all over the dresser, which made it very difficult to leave it alone and let the stain and poly finish dry — I kept finding paw prints on the drawer fronts and dresser tops.)
I also had to sand down the base of the dresser — the raw wood had taken the dark gel stain very well, but obviously I wanted it to match my new stain so I went to work with the orbital sander (before on the left, after on the right). The iron-on veneer edging sanded down pretty well, which I had definite;y been worried about since it’s very thin.
Finally it was time to stain again. I used Minwax English chestnut, which I thought looked like a nice mid-tone common to mid-century pieces.
Another drawer side-by-side, this time the raw wood on the left and a first coat of stain on the right:
Now at last I was done!
Hah! Just kidding again! This was my first time stripping and sanding a piece of furniture, and apparently I didn’t sand as evenly as I needed to for the wood to take the stain evenly. The side (above) was definitely the worst, but the drawer fronts and top were also a little blotchy. There was nothing to do but sand down these surfaces again and restain. You can imagine how I was feeling at this point…if this thing weren’t so heavy, I might have just thrown it out the back door and given up.
Many hours of sanding and staining later, I was finally satisfied with the finish — there are still a few slightly lighter spots, but nothing nearly so striking as the first go-round. I finished it off with a coat of Minwax water-based poly and let it cure for a week.

This is a photo from making the coffee table, but just focus on the Polycrylic in the foreground. You get the idea.
Then Sam and I hauled it upstairs into the bedroom. Finally, the finished piece! And I promise I’m serious this time — I don’t think I could have taken any more setbacks.
Ultimately it has about as much storage space as the tall dresser, but it feel better for sharing since Sam and I each get one side. I’ve really been working to pare down my wardrobe, so this has me continuing to move in the right direction.
I love how the space looks with a long and low dresser — it really feels like a big change in the corner. I’m also just relieved to be done sanding.
(Sharing at DIY Like a Boss, Remodelaholic, and Link Party Palooza)


